01
How it works
A diffusion model learns to remove a little noise from an image. Generating means starting from pure noise and applying it 1,000 times. RePaint turns this into inpainting without retraining: at every step, the pixels we already know are forced back in, so the model only has to invent the hidden regions, and invent them to fit.
Start of stepNoisy image xt
The whole image at the current noise level.
Known pixelsRe-noise the original
Take the real X-ray and add exactly the noise of step t−1.
Hidden pixelsDenoise with the U-Net
The model removes one step of noise from xt.
Combine with the maskxt−1
Known pixels from the original, holes from the model. Repeat until t = 0.
xt−1 = m ⊙ model(xt) + (1 − m) ⊙ ( √ᾱt−1 · x0 + √(1 − ᾱt−1) · ε )
Timestept = 999
Signal left-
start (noise)end (image)
signal √ᾱt noise √(1 − ᾱt) · standard DDPM schedule
Frames from the recorded inpainting run on a synthetic radiograph (the same run as the video below), every 50 steps.
Method
We trained a DDPM on ~9,700 DRRs rendered with DiffDRR from the VerSe and Spine 1K CT datasets.
For inpainting, we employed the RePaint algorithm (Lugmayr et al., 2022): at each reverse step, unmasked regions are replaced by forward-process samples while the model generates the masked region, keeping the output consistent with the original image.
02
Inpainting on Synthetic Data
Implant removal on synthetic DRRs, from noise to the final reconstruction.
Iterative Denoising Process
.webp)
From left to right: masked input, noisy state (t≈1000), intermediate steps (t=100, t=10), and final reconstruction (t=0).
Inpainting Process
Example 1
Example 2
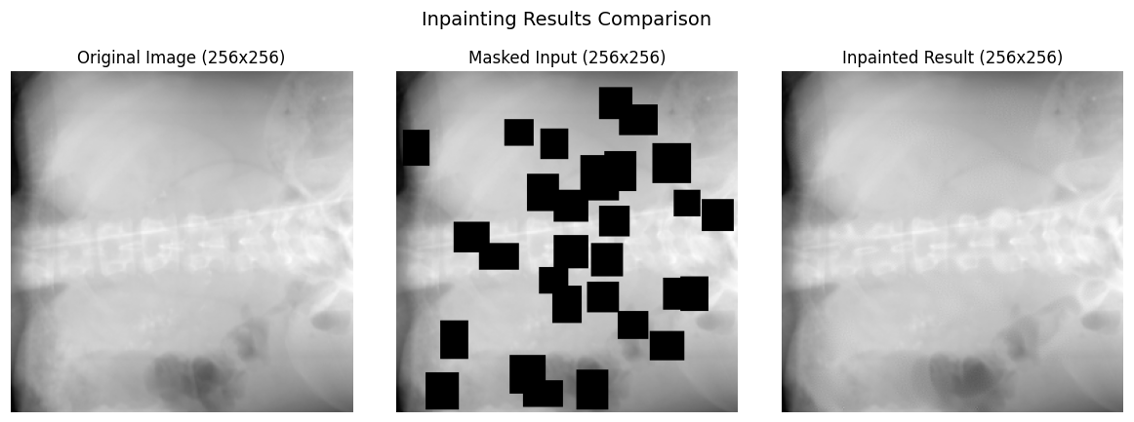
Original X-rays with Masks
Example 1
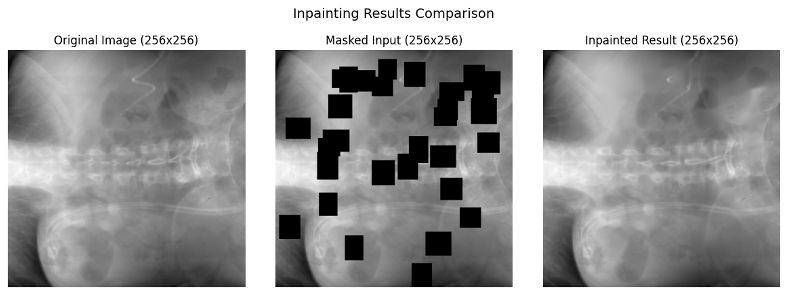
Example 2
03
Results on Real X-rays
Ten real clinical radiographs, comparing our DDPM against a U-Net baseline.
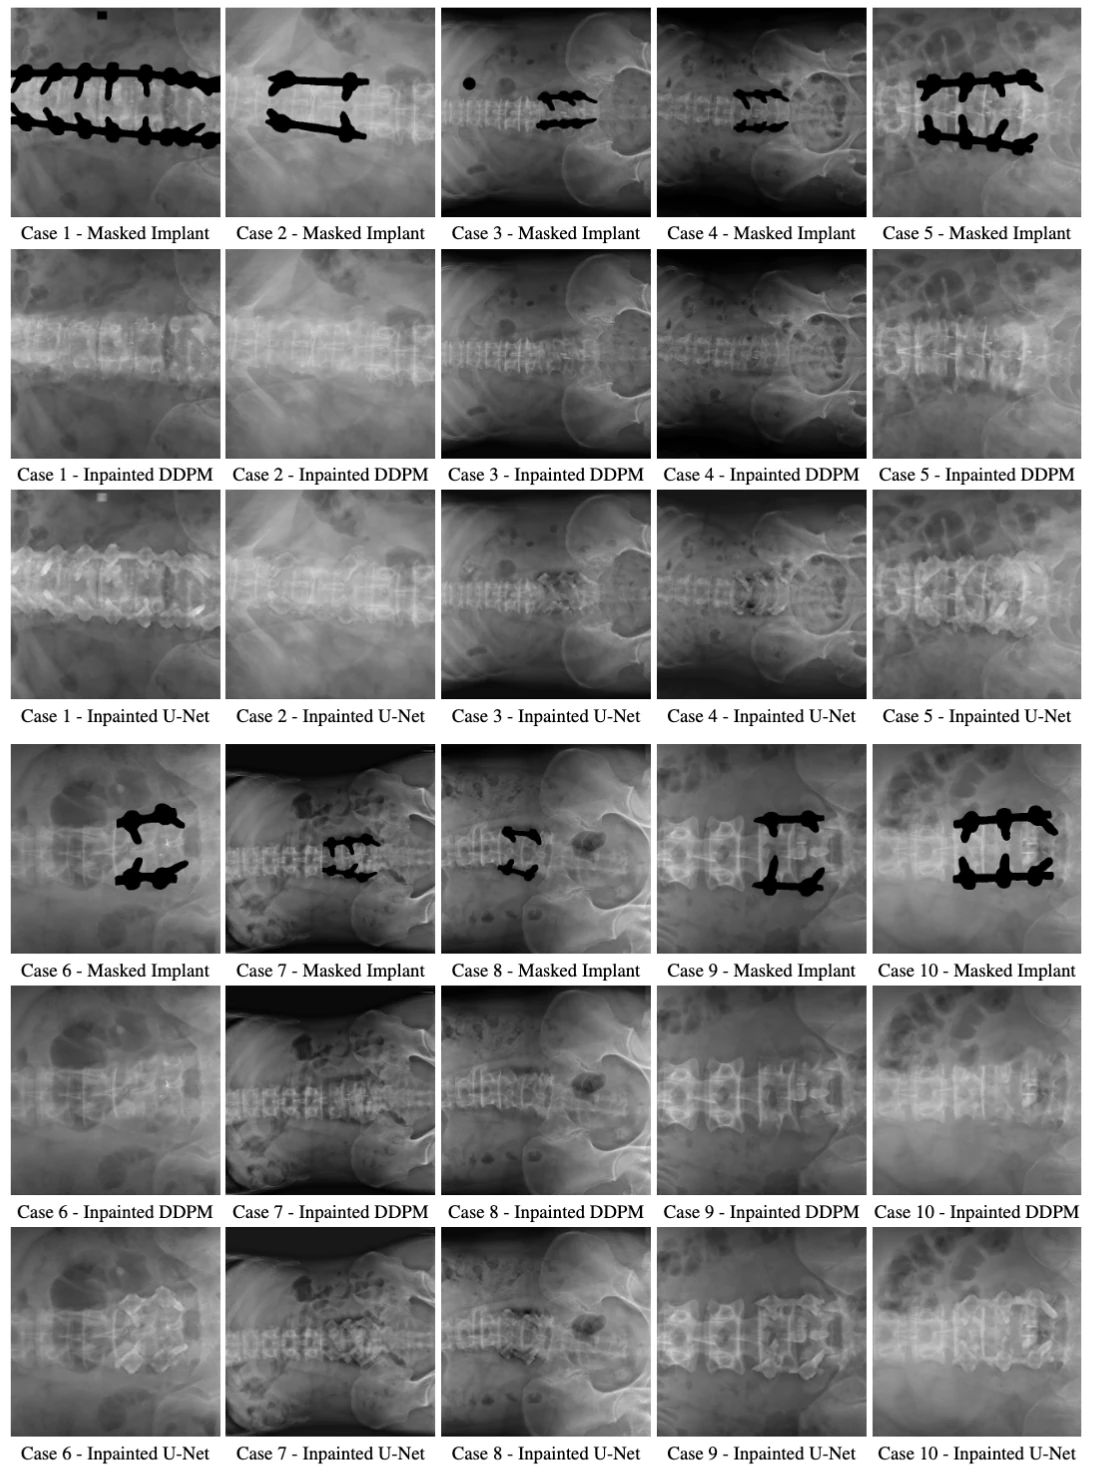
Rows per group: masked implant, DDPM (ours), U-Net baseline. The DDPM gives more realistic, structurally coherent anatomy.